SAURUS Enclosure Map
Landmark navigation from the scaffolding spawn tower to the open blast gate, with jeep and beacon mental anchors.
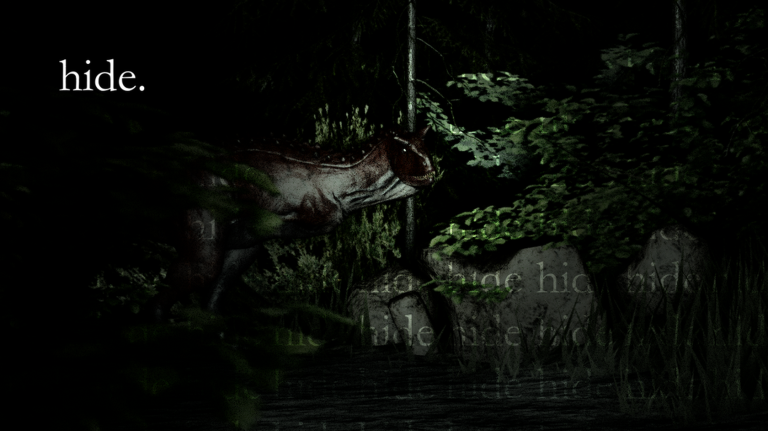
SAURUS [HORROR] does not hand you a full minimap tour. You learn the enclosure by chaining landmarks: scaffolding, dirt roads, a red beacon, white utility jeeps, pine brush, dead trees, ridgelines, and the Center Building that holds the yellow generator. This page is a prose navigation map for that chain. Use it with the numbered workstation detail on Fuse Locations and the narrative clear on How to Escape.
Survival tools between landmarks—scent, traps, doorways—live on Scent Mounds, Hazards: Bear Traps, and Survive Dinosaurs.
Mental anchors that never change
Two anchors prevent most lost-in-the-woods deaths:
- The tall red beacon over the tree line marks the Center Building compound. When panic audio hits, find the beacon before you invent a new trail.
- Parked white utility jeeps at intersections are breadcrumbs. Mentally chain jeep → red beacon → generator room so fear does not erase the map.
Laptop glow marks fuse workstations. Floodlights and the beacon mark home. If you can see neither, stop sprinting diagonals through grass—that is how bear traps and dinosaurs win.
Landmark route (teaching order)
Walk this order until it is muscle memory. Exact outdoor pathing can flex slightly, but the teaching spine stays consistent across clear runs.
1. Scaffolding spawn tower
You begin in the metal scaffolding cage. Exit onto the grass through the open gate. Do not dive into pine brush yet. Orient on the red beacon immediately.
2. Fuse #1 table
Directly outside the cage sits a white folding table with an open laptop and a black equipment case. Collect Fuse #1 here. This pickup is intentionally free—bank the habit of grabbing it every attempt before wanderlust starts.
3. Dirt road to the beacon
Follow the dirt road toward the red beacon. Stay on the road edge more than open lawn. Listen for stomps before you commit to the compound approach.
4. Red beacon / Center Building
The beacon sits over the central concrete facility. Climb the approach, pass security framing, and enter the Center Building. This structure is both objective hub and mid-run fortress—standard interiors act as shelter while dinosaurs pressure yards and doors.
5. Generator room (Fuse #2 + first deposit)
Reach the rear machinery room. Fuse #2 sits on the folding table in front of the large yellow generator. Insert Fuse #1 and #2 for about 33% power. That early bank is non-negotiable for consistent escapes.
6. Side fence gate
Leave through a side fence gate into darker perimeter trails when the pale predator is not staring at the doors. Prefer side exits over a suicidal front peek when a hunter camps the entrance path.
7. Pine brush — Fuse #3
Follow the dirt trail that curves around rock walls toward dense pine brush. Hunt laptop glow for the Fuse #3 workstation. Note a nearby jeep or rock as a return landmark.
8. Jeeps and winding tracks
Continue along winding tracks past abandoned white utility jeeps. Treat each jeep cluster as a “you are not lost” checkpoint back toward the beacon.
9. Dead trees — Fuse #4
Cross the valley clearing toward a lit desk under bare, dead trees for Fuse #4. This clearing is wide—sweep the ground for traps before cutting straight lines, and listen for roars before committing to the open middle.
10. Ridgeline — Fuse #5
Sweep adjacent ridgeline paths for the next laptop-lit setup and Fuse #5. Ridgelines often host scent mounds; mask before you drop back toward the beacon if stomps circle the compound.
Deposit outer progress at the generator when you return—power should approach ~83% after banking these pieces with your earlier 33%.
11. Lower dirt road — Fuse #6
Head out along the lower dirt road for the sixth folding-table workstation. Take Fuse #6 and rotate home immediately. Do not sightseeing-tour the perimeter at 83%.
12. Main roadway and blast gate
After the final insert hits FUSE: 100%, leave through the facility front entrance onto the central dirt trail. Sprint the main roadway toward the outer concrete containment wall. The steel blast door should be lifted with green marker lights. Cross the threshold to finish the trial.
How to use jeeps and the beacon under pressure
When a roar hits and your camera spins:
- Stop the panic sprint.
- Find either a jeep silhouette or the red beacon glow.
- Move beacon-ward along dirt, not through random grass.
- Door-check at the Center Building before you enter or exit.
This four-step reset saves more runs than memorizing every bush. It also pairs with crouch along chainlink when the dinosaur circles the compound during late deposits.
Solo route planning
Solo players should run a tight spine: spawn → 33% bank → one outer fuse → listen → return → repeat until 83% → Fuse #6 → 100% → gate. Do not greed three outer fuses before the first mid deposit if you are still learning landmarks. Solo teaches map memory; use Solo Tips for pacing context and Survive Dinosaurs for doorway patience between segments.
Carry stacks only when the road home is clearly quiet. A solo death with four unbanked fuses is a full reset of risk.
Co-op route planning
With two to five players, split the map by landmark, not by vibes:
- Beacon runner / generator specialist — owns inserts and percent callouts at the Center Building
- Pine / dead-tree sweeper — takes Fuse #3 and #4 corridor
- Ridgeline / lower-road sweeper — takes Fuse #5 and #6 logic
- Lookout — calls dinosaur facing at doors and trap warnings in grass
Funnel carriers back through the beacon compound instead of meeting in open clearings. Never have five people insert at once while ignoring audio. Deep role playbooks sit under Co-op Tips.
Hazard overlays on the same map
- Bear traps — grass and trail corners, especially valley clearings; keep the beam low (Hazards: Bear Traps)
- Scent mounds — ridgelines and thickets; mask before exposed returns (Scent Mounds)
- Dinosaur patrol geometry — some rounds camp spawn exits, others glue a hunter to central approaches; wait for turns, use side gates
Challenge modifiers keep this landmark spine but raise mistake cost—see Challenge Mode.
Quick landmark checklist
- Beacon oriented from spawn
- Fuse #1 table grabbed
- Dirt road to Center Building
- 33% generator bank
- Side gate to pine brush (#3)
- Jeeps noted on winding tracks
- Dead trees (#4) with trap sweep
- Ridgeline (#5) with scent if needed
- ~83% mid deposit
- Lower dirt road (#6)
- 100% insert → main road → blast gate
Related guides
- Fuse Locations — workstation and percent sheet
- How to Escape — phased clear and badge notes
- Scent Mounds — odor tools on ridgelines
- Hazards: Bear Traps — ground clamps on this route
- Survive Dinosaurs — doorway and crouch timing
- Getting Started — first-hour habits
- Solo Tips — one-player route discipline
- Guides Hub — full walkthrough index
Learn the beacon and the jeeps first. Every clean SAURUS escape is a landmark story told under dinosaur pressure—not a random forest jog.
Frequently Asked Questions
Quick answers for SAURUS survivors.
What is the best landmark to navigate SAURUS?
The tall red beacon marking the Center Building. Pair it with white utility jeeps at trail intersections when you get turned around in the dark.
What is the teaching order for the enclosure route?
Spawn tower → Fuse #1 table → dirt road → beacon/Center Building → generator bank → side gate → pine brush → jeeps → dead trees → ridgeline → lower dirt road → main roadway blast gate.
How should solo players plan the map?
Bank early at ~33%, then loop one outer fuse at a time with listen-and-return habits instead of greed-grabbing multiple unbanked pieces.
How should co-op teams split the enclosure?
Assign a generator specialist at the beacon compound and sweepers for pine/dead-tree versus ridgeline/lower-road corridors, with a lookout on dinosaur facing.